
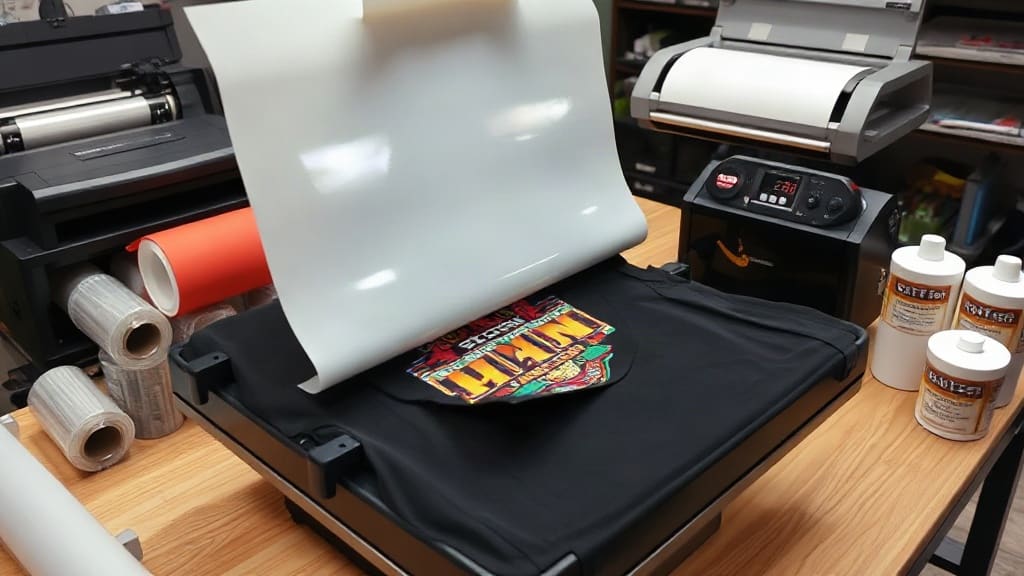
If you're new to custom apparel, dtf transfers are a game-changer. They allow you to print vibrant, durable designs onto almost any fabric without the complexity of screen printing. But mastering the process takes practice and understanding. In this guide, I'll walk you through every step, from preparing your artwork to pressing your final product, and share insider tips to help you avoid common pitfalls.
I remember my first attempt at using these transfers. I was excited but clueless. My design peeled off after the first wash, and the colors looked faded. After many trials and errors, I learned the nuances. Now, I want to help you skip the frustration and get it right the first time.
What Are DTF Transfers?
DTF stands for Direct to Film. Unlike sublimation, which requires polyester, or vinyl, which is limited in colors, dtf transfers involve printing your design onto a special PET film using a DTF printer. Then, you apply adhesive powder, cure it, and finally heat-press the film onto your garment. The result is a soft, stretchable, and durable print that works on cotton, polyester, blends, even leather and nylon.
Why Choose DTF Over Other Methods?
DTF transfers offer several benefits. They produce vivid colors with high detail. They don't require weeding, unlike vinyl. They work well on dark and light fabrics. And they can be stored for later use, making them perfect for on-demand production. For small businesses, this technology reduces inventory costs and allows for quick turnaround times.
Essential Equipment and Supplies
Before you start, you'll need the right tools. Here's a checklist of what you'll need to produce professional dtf transfers.
- DTF Printer: This is a specialized inkjet printer that uses CMYK plus white ink. You can convert some standard printers, but a dedicated DTF printer is recommended for consistency.
- PET Film: This is the transfer film that carries your design. It has a coating that adheres to the ink.
- DTF Inks: These are water-based or pigment inks designed for DTF. Ensure you use the correct type for your printer.
- Adhesive Powder: This hot-melt adhesive is applied to the wet ink before curing. It's what bonds the design to the fabric.
- Heat Press: A quality heat press with even pressure and temperature control is crucial. A clamshell or swing-away press works well.
- Curing Oven or Heat Gun: To melt the adhesive powder, you need a heat source. A curing oven is ideal for bulk production, but a heat gun can work for small orders.
I recommend investing in a reliable printer and a heat press with digital controls. Cheap equipment leads to inconsistent results and wasted materials.
Step-by-Step Process for Creating DTF Transfers
Now, let's dive into the actual process. I'll break it down into manageable steps.
1. Prepare Your Artwork
First, design your artwork using software like Adobe Illustrator or Photoshop. Ensure your design is high-resolution (at least 300 DPI). If it has text, convert it to outlines to avoid font issues. For DTF, you need to separate colors? Not exactly. The printer handles color separation, but you need to ensure your design has a white layer beneath the colors for opacity on dark garments. Your RIP software will handle this, but you can also create a separate white layer manually.
Tip: Save your design as a PNG with transparency to preserve fine details.
2. Print the Design onto Film
Load the PET film into your printer with the shiny side up? Actually, it depends on your printer. Typically, you print on the matte side. Consult your printer's manual. Print your design using the DTF color profile. The printer will lay down the CMYK colors and then a layer of white ink underneath. This white base is what makes DTF prints vibrant on dark fabrics.
Ensure the ink is fully printed before moving on. The film should come out with wet ink.
3. Apply Adhesive Powder
Immediately after printing, while the ink is still wet, you need to apply the adhesive powder. You can do this manually by sprinkling the powder over the design or using a powder shaker. For consistency, I recommend using a powder applicator that evenly coats the design.
Make sure the powder covers the entire design, including the white layer. Then, gently shake off the excess powder. This step is critical; if you miss spots, the transfer won't adhere properly.
4. Cure the Powder
Now, you need to melt the adhesive powder so it fuses with the ink. Place the film in a curing oven set to about 160°C (320°F) for 2-3 minutes, or use a heat gun. The powder will turn from a granular texture to a smooth, glossy layer. This step activates the adhesive properties.
If you're using a heat press instead of an oven, you can place the film on the press with a Teflon sheet and press at 160°C for about 30 seconds. But be careful not to overheat, as it may cause the film to curl.
After curing, let the film cool down completely before handling. This ensures the adhesive is set.
5. Press the Transfer onto Your Garment
Preheat your heat press to 160-170°C (320-338°F) with medium to high pressure. Place your garment on the press, making sure it's smooth and wrinkle-free. Then, lay the transfer film with the design facing down onto the garment. Use heat-resistant tape to secure the edges to prevent shifting.
Press for 15-25 seconds, depending on the fabric. For cotton, 20 seconds usually works. For polyester, a shorter time with lower temperature might be needed to avoid scorching. Always test on a scrap piece first.
6. Peel and Finish
After pressing, it's time to peel the film. You have two options: hot peel or cold peel. For DTF transfers, a cold peel is often recommended because it gives the adhesive time to set. Wait for the transfer to cool down to room temperature, then gently peel the film off. You should see the design perfectly transferred onto the fabric.
The print should feel soft and flexible. If you notice any areas that didn't adhere, you can re-press with a Teflon sheet for a few more seconds.
Common Mistakes and How to Avoid Them
Even experienced printers make mistakes. Here are some pitfalls to watch out for.
Incorrect Ink Amounts
Too much ink can cause bleeding, while too little results in faded prints. Calibrate your printer regularly and use the recommended ink settings.
Powder Not Applied Evenly
Uneven powder distribution leads to weak adhesion. Use a shaker with a mesh screen for a consistent layer.
Overcuring or Undercuring
Undercured powder won't stick to the fabric; overcured powder can turn yellow. Follow the manufacturer's guidelines for time and temperature.
Pressing with Too Much Pressure
Excessive pressure can cause the adhesive to squeeze out and create a shiny edge. Use the recommended pressure for your fabric type.
Ignoring Fabric Care
Always pre-wash garments to remove any chemicals that might interfere with adhesion. And remind your customers to wash inside out in cold water for longevity.
Advanced Tips for Perfect DTF Transfers
Once you've mastered the basics, you can refine your technique.
- Test Prints: Always run a test print to check color accuracy and alignment before a full batch.
- Use a White Toner: Some printers have a dedicated white toner mode for better opacity. Experiment to see what works best.
- Layer Designs: For multi-colored designs, you can layer multiple transfers, but it's tricky. Ensure each layer is fully cured before adding the next.
- Invest in a Quality Film: Cheap films may not peel properly or could leave residue. Try different brands to find one that works well with your ink and powder.
Frequently Asked Questions
Can I use DTF transfers on any fabric?
Yes, dtf transfers are versatile and work on cotton, polyester, blends, and even some synthetic materials. However, for very stretchy fabrics, you may need to use a stretchable adhesive powder to prevent cracking.
How long do DTF transfers last?
With proper care, DTF transfers can last for many washes. They are durable and flexible, but washing in cold water and avoiding harsh detergents will extend their life. I've seen prints last over 50 washes without significant fading.
Do I need a special printer for DTF transfers?
Yes, ideally you need a printer that can handle DTF inks and white ink. Some standard printers can be converted, but using a dedicated DTF printer ensures reliability and quality.
Can I reuse the DTF film?
No, the film is a one-time use product. Once you've applied the transfer, the film is no longer usable for printing. However, you can store unprinted films properly for future use.
What is the difference between hot peel and cold peel?
Hot peel involves removing the film immediately after pressing, while cold peel waits until it cools. For DTF, cold peel is generally recommended to ensure the adhesive sets properly and prevents the design from lifting.
Conclusion
Mastering dtf transfers takes practice, but the results are worth it. By following this guide and experimenting with your equipment, you'll be able to create professional-looking custom apparel that rivals any other method. Remember to start with simple designs, test your settings, and always prioritize quality. Happy printing!